snowdrop

Deploy a Spring Boot App with HTTPS by using JKS File into OpenShift 4

For this sample, im planning on creating a spring boot but with an SSL endpoint and deploy it to OpenShift 4 with a passthrough route.

So lets start with creating a JKS file, and put “password” as its password variable.

$ keytool -genkey -alias app-key -keyalg RSA -keystore app.jks

where for this example im using below variables for creating JKS file

C=ID; ST=Jakarta; L=Jakarta; O=Red Hat; OU=Open Innovation Labs; CN=Red Hat

Now we start creating a spring boot app,

package com.redhat.openinnovationlabs.sample.jks;

import org.springframework.boot.SpringApplication;
import org.springframework.boot.autoconfigure.SpringBootApplication;

@SpringBootApplication
public class Application {
    public static void main(String[] args) {
        SpringApplication.run(Application.class, args);
    }
}
package com.redhat.openinnovationlabs.sample.jks.controller;

import org.springframework.web.bind.annotation.GetMapping;
import org.springframework.web.bind.annotation.RestController;

import java.util.HashMap;
import java.util.Map;

@RestController
public class HelloWorldController {
    @GetMapping("/")
    public Map index() {
        return new HashMap() {{
            put("hello", "world");
        }};
    }
}

Now is the most important thing, a properties file where we store all the configurations. For this sample, we would take the configurations from environment variables.

server.port=8443

server.ssl.enabled=true
server.ssl.key-alias=app-key
server.ssl.key-store-type=JKS
server.ssl.key-store-password=${JKS_PASSWORD}
server.ssl.key-store=file:${JKS_LOCATION}

Create a Dockerfile to create our java image

FROM openjdk:11.0.7-jre-slim-buster

LABEL base-image="openjdk:11.0.7-jre-slim-buster" \
      java-version="11.0.7" \
      purpose="Hello World with SSL, Java and Dockerfile"

MAINTAINER Muhammad Edwin < edwin at redhat dot com >

WORKDIR /deployments

COPY target/*.jar app.jar

USER 185

EXPOSE 8443

CMD ["java", "-jar","app.jar"]

And deploy it into OpenShift 4

$ oc new-build --strategy docker --binary \ 
	--docker-image openjdk:11.0.7-jre-slim-buster --name spring-boot-jks

$ oc start-build spring-boot-jks --from-dir . --follow

$ oc new-app --name=spring-boot-jks \ 
	--image-stream=test-project/spring-boot-jks:latest -n test-project

But apps will not work since it is missing a JKS file and some configurations. Therefore we need to create some Secrets in OpenShift 4 by using below command,

$ oc create secret generic spring-boot-jks-file --from-file app.jks

$ oc create secret generic spring-boot-secrets \
	--from-literal=JKS_PASSWORD=password \ 
	--from-literal=JKS_LOCATION=/tmp/jks/app.jks

And assign them into our apps,

$ oc set volume dc/spring-boot-jks --add \
	--name=spring-boot-jks-mnt --secret-name=spring-boot-jks-file \
	--mount-path=/tmp/jks/

$ oc set env dc/spring-boot-jks --from=secret/spring-boot-secrets

Expose our apps endpoint by using a passthrough Route

$ oc create route passthrough  --service spring-boot-jks --port=8443

And run some curl to our apps to see our application’s ssl configuration.

curl -kv https://<apps-ip>

* SSL connection using TLSv1.2 / ECDHE-RSA-AES256-GCM-SHA384
* ALPN, server did not agree to a protocol
* Server certificate:
*  subject: C=ID; ST=Jakarta; L=Jakarta; O=Red Hat; OU=Open Innovation Labs; CN=Red Hat
*  start date: Apr 11 12:27:14 2022 GMT
*  expire date: Jul 10 12:27:14 2022 GMT
*  issuer: C=ID; ST=Jakarta; L=Jakarta; O=Red Hat; OU=Open Innovation Labs; CN=Red Hat
*  SSL certificate verify result: self signed certificate (18), continuing anyway.
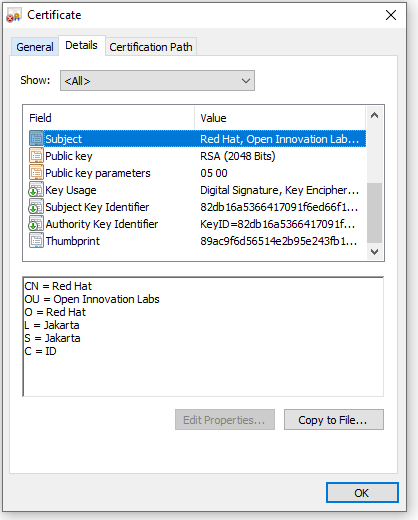
Code for this sample can be accessed here,

https://github.com/edwin/spring-boot-jks

Simple Hello World App by Using Snowdrop BOM Dependency Management

According to its website (snowdrop.dev), snowdrop is a cloud native spring boot app which is a project within the Red Hat community. From syntax perspective, it’s pretty much the same as ordinary Spring Boot and we can see on below code as an example.

Let’s start by creating a new java project with pom.xml, the highlighted part here is the bom configuration provided by Snowdrop.

<?xml version="1.0" encoding="UTF-8"?>
<project xmlns="http://maven.apache.org/POM/4.0.0"
         xmlns:xsi="http://www.w3.org/2001/XMLSchema-instance"
         xsi:schemaLocation="http://maven.apache.org/POM/4.0.0 http://maven.apache.org/xsd/maven-4.0.0.xsd">
    <modelVersion>4.0.0</modelVersion>

    <groupId>com.edw</groupId>
    <artifactId>HelloWorldSnowdrop</artifactId>
    <version>1.0-SNAPSHOT</version>

    <repositories>
        <repository>
            <id>redhat-early-access</id>
            <name>Red Hat Early Access Repository</name>
            <url>https://maven.repository.redhat.com/earlyaccess/all/</url>
        </repository>
        <repository>
            <id>redhat-ga</id>
            <name>Red Hat GA Repository</name>
            <url>https://maven.repository.redhat.com/ga/</url>
        </repository>
    </repositories>

    <pluginRepositories>
        <pluginRepository>
            <id>redhat-early-access</id>
            <name>Red Hat Early Access Repository</name>
            <url>https://maven.repository.redhat.com/earlyaccess/all/</url>
        </pluginRepository>
        <pluginRepository>
            <id>redhat-ga</id>
            <name>Red Hat GA Repository</name>
            <url>https://maven.repository.redhat.com/ga/</url>
        </pluginRepository>
    </pluginRepositories>

    <properties>
        <snowdrop-bom.version>2.3.6.Final-redhat-00001</snowdrop-bom.version>
        <spring-boot.version>2.1.4.RELEASE-redhat-00001</spring-boot.version>
        <maven.compiler.source>11</maven.compiler.source>
        <maven.compiler.target>11</maven.compiler.target>
    </properties>

    <dependencyManagement>
        <dependencies>
            <dependency>
                <groupId>dev.snowdrop</groupId>
                <artifactId>snowdrop-dependencies</artifactId>
                <version>${snowdrop-bom.version}</version>
                <type>pom</type>
                <scope>import</scope>
            </dependency>
        </dependencies>
    </dependencyManagement>

    <dependencies>
        <dependency>
            <groupId>org.springframework.boot</groupId>
            <artifactId>spring-boot-starter-web</artifactId>
        </dependency>
    </dependencies>


    <build>
        <pluginManagement>
            <plugins>
                <plugin>
                    <groupId>org.springframework.boot</groupId>
                    <artifactId>spring-boot-maven-plugin</artifactId>
                    <version>${spring-boot.version}</version>
                </plugin>
            </plugins>
        </pluginManagement>
    </build>

</project>

Next is creating an ordinary rest api, like a regular spring boot.

package com.edw;

import org.springframework.boot.SpringApplication;
import org.springframework.boot.autoconfigure.SpringBootApplication;

@SpringBootApplication
public class Main {
    public static void main(String[] args) {
        SpringApplication.run(Main.class, args);
    }
}
package com.edw.controller;

import org.springframework.web.bind.annotation.GetMapping;
import org.springframework.web.bind.annotation.RestController;

import java.util.HashMap;
import java.util.Map;

@RestController
public class HelloWorldController {

    @GetMapping("/")
    public Map index() {
        return new HashMap() {{
            put("hello", "world");
        }};
    }
}

Build, and run it thru IDE. And can test by using a curl command,

curl -kv http://localhost:8080/

Code can be accesses on below github link,

https://github.com/edwin/hello-world-snowdrop