go

Leveraging Nexus when Building a Golang Application

For this example, I’m creating a very simple Golang app

package main

import (
        "github.com/beego/beego/v2/server/web"
)

func main() {
        web.Router("/", &MainController{})
        web.Run()
}

type MainController struct {
        web.Controller
}

func (c *MainController) Get() {
        response := map[string]string{
                "message": "Hello World Beego",
                "status":  "success",
        }
        c.Data["json"] = response
        c.ServeJSON()
}

And here’s the required go.mod file:

module hello-beego

go 1.24.7

require github.com/beego/beego/v2 v2.3.8

Next, we’ll set up our Nexus to store the required Golang libraries. First, we start by creating a repository named go-proxy. The remote storage location for this repository will be proxy.golang.org.

We also need to point our Golang build proxy to the Nexus repository by exporting the GOPROXY variable.

$ export GOPROXY= http://localhost:8081/repository/go-proxy/

For more detailed logs, we can pull all our libraries using the following command:

$ GODEBUG=mod=1,gocacheverify=1 go mod tidy -v -x

This will show whether we’re able to pull libraries from the Nexus repository. We can also see the libraries that are being pulled in our Nexus repository.

By following above steps, we can successfully leverage Nexus to manage our Golang dependencies, ensuring a more efficient and controlled build environment.

A Beego Golang Framework on top of Openshift 4

Golang has a lot of web frameworks and Beego is one it, it provides a rapid development of enterprise application in Go, including RESTful APIs, web apps and backend services.

The concept for this is pretty much simple, a json rest api showing helo world as response. Deployed as containerized image, on top of Kubernetes. So lets start with some Go files,

package main

import (
	_ "HelloBeego/routers"
	"github.com/beego/beego/v2/server/web"
)

func main() {
	web.Run()
}

A router file,

package routers

import (
	"HelloBeego/controllers"
	"github.com/beego/beego/v2/server/web"
)

func init() {
	web.Router("/", &controllers.HelloController{})
}

and a controller,

package controllers

import "github.com/beego/beego/v2/server/web"

type HelloController struct {
	web.Controller
}

type helloResponse struct {
	Greeting string `json:"greeting"`
}

func (u *HelloController) Get() {

	user := helloResponse{}
	user.Greeting = "Hello World Edwin"

	u.Data["json"] = user
	u.ServeJSON()
}

The tricky part is creating a multi-stage build by using Docker to build this and deploy by using a different images.

FROM registry.access.redhat.com/ubi8/go-toolset
USER root
RUN mkdir /build/
ADD . /build/
RUN cd /build/  go build

FROM registry.access.redhat.com/ubi8/ubi-minimal
COPY --from=0 /build/HelloBeego /usr/local/bin/app
CMD app
EXPOSE 8080

Run docker build command, deploy the containerized image into Openshift 4 and create Routes in order to make the application accessible. The sample commands are in below,

$ oc new-app . --strategy=docker

$ oc create route edge --service=beego-rest-hello-world

Code can be accessed in below Github repo,

https://github.com/edwin/beego-rest-hello-world

A Simple RHPAM-Application Integration with Multi User Approval Workflow

On this article, im trying to create a simple Leave Approval System which is deployed as microservices. So basically there are two different application, one Golang app as Frontend, and RHPAM (Red Hat Process Automation Manager) as Backend, and both are communicating by using a simple REST API.

Basically there are two users involved here, one is adminUser as requester, and spv02 as approver. As approver, spv02 can either accept or reject the requested leave. Easiest way to described the approval workflow is perhaps described in below image,

Lets start by creating two user on RHPAM,

adminUser / password
spv02 / password

Import project from github (code is at the end of this article), build and deployed it to KIE.

Now lets start with creating an entry form,

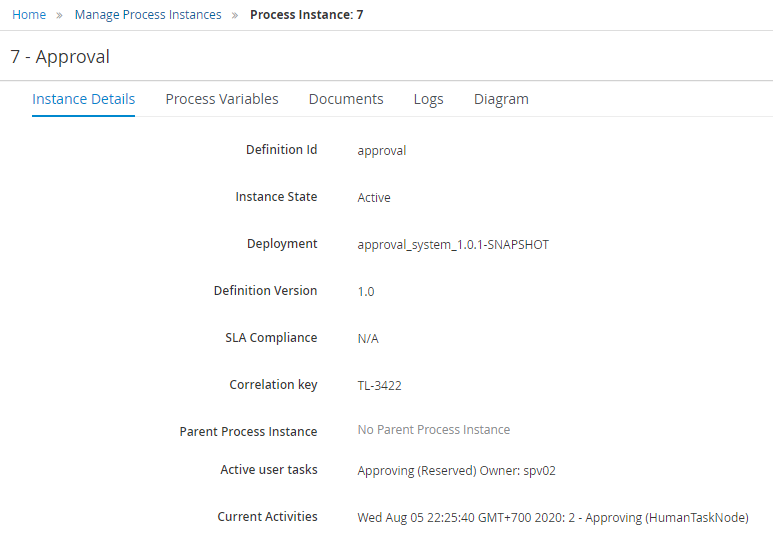
The touch-point between frontend and pam on this ui is RHPAM’s “process instances” API, and im adding a correlation-key which is a unique business primary key.

curl -L -X POST 'http://localhost:8080/kie-server/services/rest/server/containers/approval_system_1.0.1-SNAPSHOT/processes/approval/instances/correlation/TL-3422' \
-H 'Authorization: Basic YWRtaW5Vc2VyOnBhc3N3b3Jk' \
-H 'Content-Type: application/json' \
--data-raw '{
    "application": {
        "com.myspace.approval_system.Request": {
            "days": 9,
            "purpose":"Sick Leave"
        }
    }
}'
Next step is displaying all leave request that have been made by this corresponding user, we can capture this by using server queries API, given a specific username as initiator parameter,

curl -L -X GET 'http://localhost:8080/kie-server/services/rest/server/queries/processes/instances?initiator=adminUser&page=0&pageSize=10&sortOrder=true&status=1&status=2&status=3' \
-H 'Accept: application/json' \
-H 'Authorization: Basic YWRtaW5Vc2VyOnBhc3N3b3Jk'

Moving forward, now we are seeing from approval’s point of view, first we need to display what are the tasks which are assign to this user.

curl -L -X GET 'http://localhost:8080/kie-server/services/rest/server/queries/tasks/instances/owners?page=0&pageSize=10&sortOrder=true&sort=taskId' \
-H 'Accept: application/json' \
-H 'Authorization: Basic c3B2MDI6cGFzc3dvcmQ='

And the ability to Approve or Reject a specific request, there are two APIs which are involved here. That is one API for starting the task, and another one to complete it. Make sure you differentiate parameters on “approved” field, use “false” for Rejecting request, and “true” for Accepting request.

curl -L -X PUT 'http://localhost:8080/kie-server/services/rest/server/containers/approval_system_1.0.1-SNAPSHOT/tasks/6/states/started' \
-H 'Authorization: Basic c3B2MDI6cGFzc3dvcmQ='
curl -L -X PUT 'http://localhost:8080/kie-server/services/rest/server/containers/approval_system_1.0.1-SNAPSHOT/tasks/6/states/completed' \
-H 'Authorization: Basic c3B2MDI6cGFzc3dvcmQ=' \
-H 'Content-Type: application/json' \
--data-raw '{
    "approved": false
}'

And here are my repositories on Github,

frontend : 
https://github.com/edwin/frontend-for-approval-rhpam

backend :
https://github.com/edwin/rhpam-simple-approval-concept

Have fun playing with RHPAM 🙂